Why Canyoning for Beginners Is a Great First Adventure
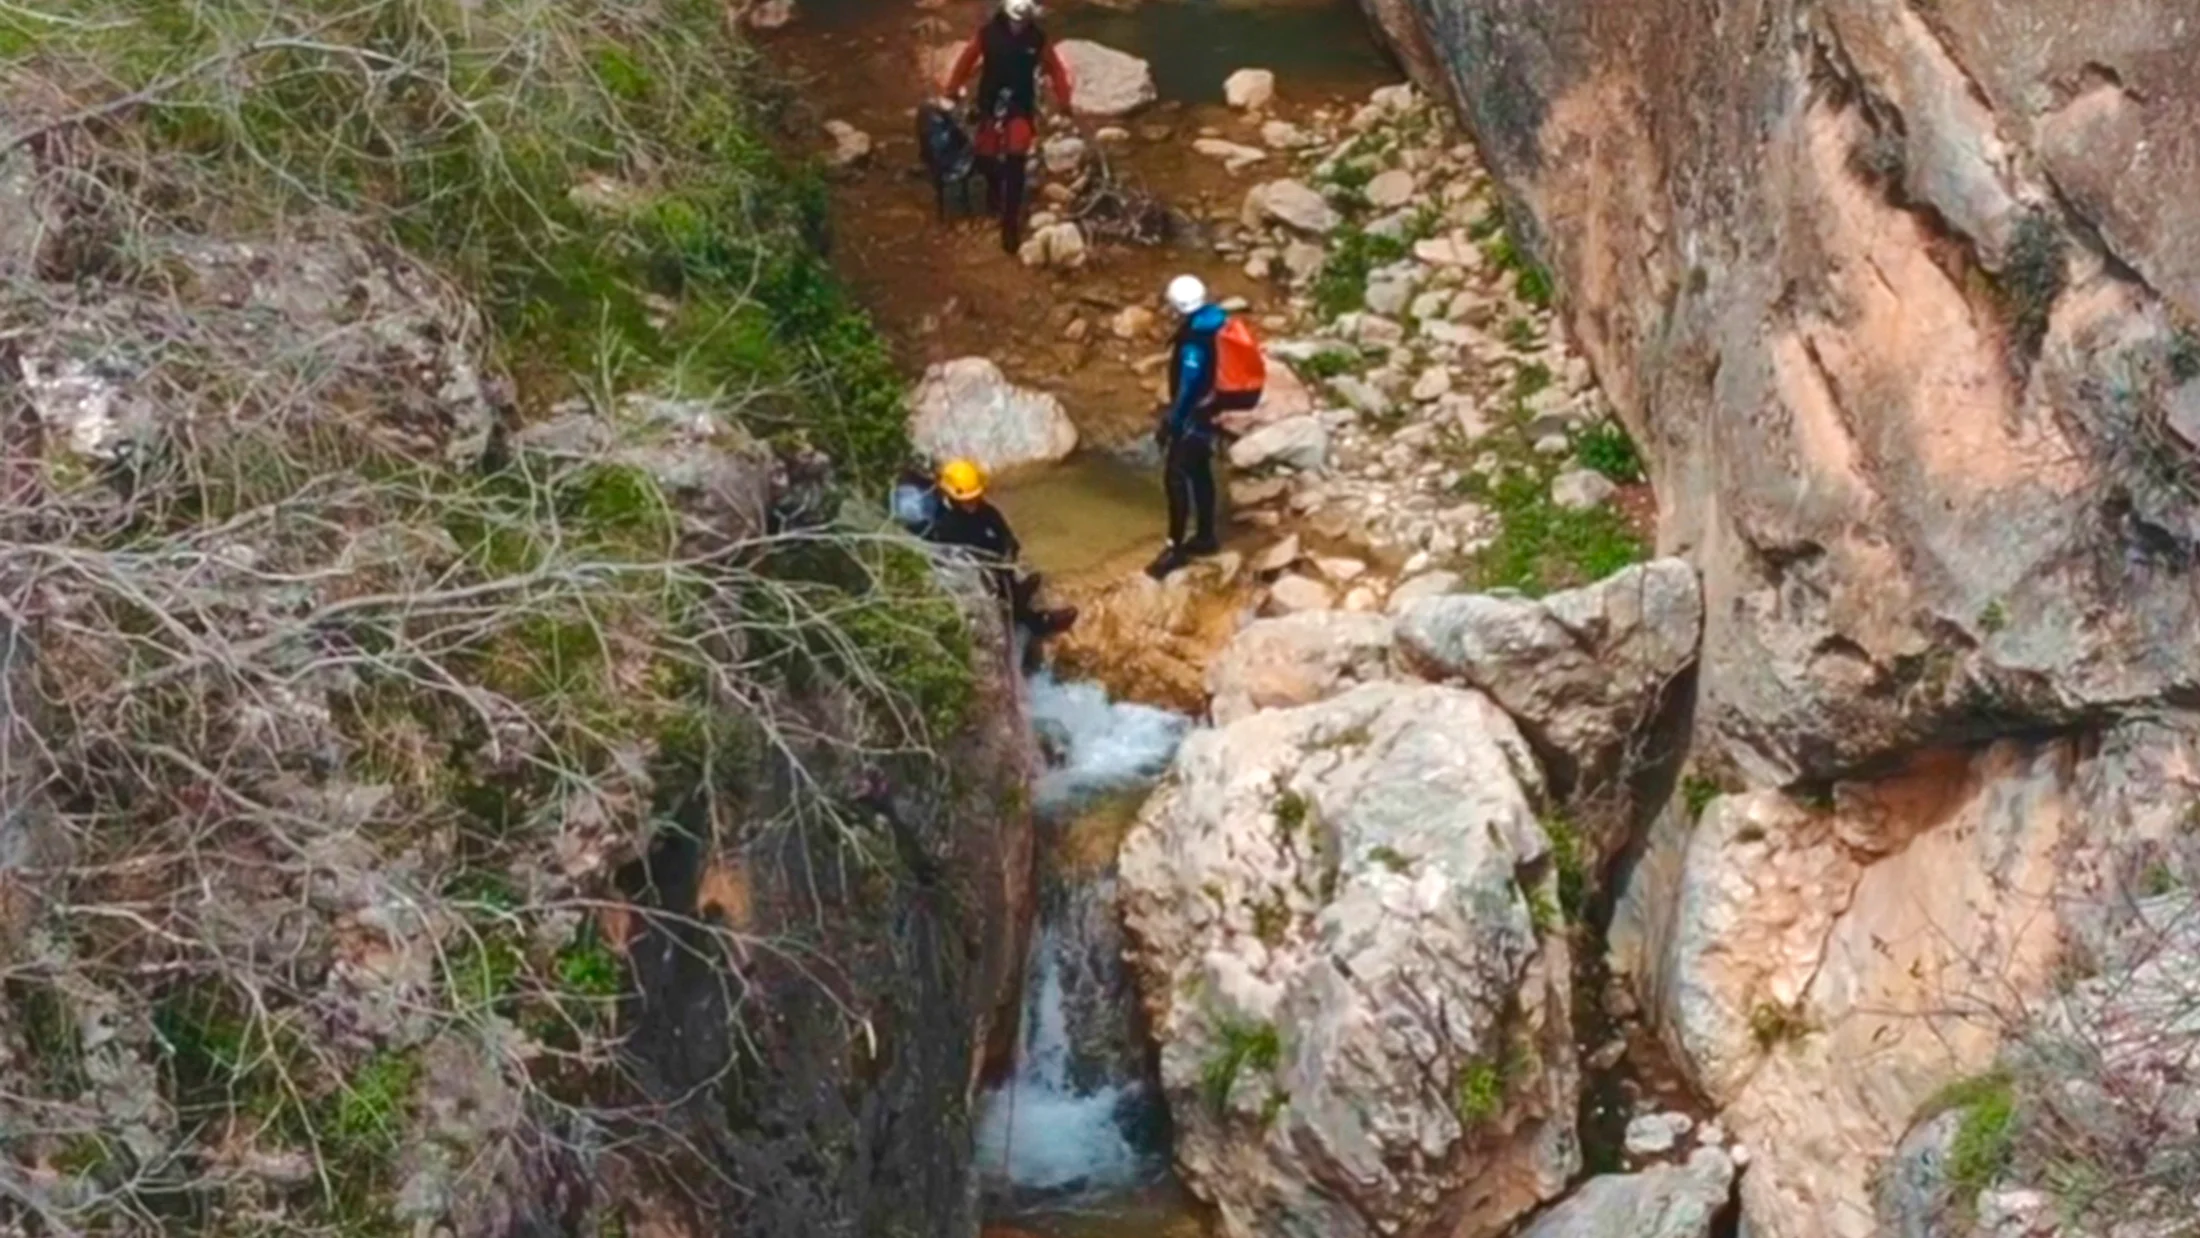
You want a real outdoor experience that still feels achievable. Canyoning for beginners blends hiking, swimming, and rope work to follow a stream through gorges, pools, and small waterfalls. It’s adventure without the need for elite fitness or years of technical training, especially when you choose the right route and go with a qualified guide. Cold mountain water beads on your wetsuit as sunlight slices through a narrow gorge.
Think of canyoning as progression through a watercourse: you walk, scramble, slide, jump (always optional), and rappel short drops with a rope. Beginner canyons use modest heights, calm pools, and clear escape routes. Most routes for a first canyoning route take 2–4 hours inside the canyon plus short approaches, so it fits nicely in a day out with friends, couples, or families with teens. Local guides bring technical gear and know the safest lines, which reduces uncertainty for your first time.
In this guide you get what you actually need to plan: where to find easy canyoning routes Spain beginners love, when to go for stable water levels, how to reach the trailhead and pick nearby stays, and what canyoning equipment matters most. You also get a step-by-step of a typical day, the main activities (rappels, slides, and jumps), and how guides adapt each move to your comfort level. We break down safety basics with clear actions—how to read water flow, group communication, and first-aid essentials—so you arrive prepared, not overwhelmed.
By the end, you’ll know how to choose a safe route, what to wear and pack, how to move in the water, and the simplest way to book guided canyoning tours in Spain. If you prefer to go at your own pace, we include criteria to pick appropriate itineraries and where to verify conditions. Take it section by section, mark your checklist, and set a date—your first canyon is closer than you think.
Picuco te puede ayudar
Does something here catch your eye?
Tell us.
Write to us on WhatsApp or email: we answer questions, find the best options and help you sort out the booking.
Essential Info for Your First Canyoning Route
The right place, timing, and logistics make a first experience smooth. In clear morning air, you hear water murmuring long before you see the canyon.
Where to go: easy routes to start
Spain has distinct canyoning hubs with excellent beginner options. Look for providers listing “beginner” or V2–V3 aquatic ratings (a simple European scale where “V” gauges vertical difficulty and “A” aquatic difficulty). When browsing Spanish sites, search terms like “rutas fáciles barranquismo” help surface suitable itineraries.
Here are four accessible classics to consider:
| Route (Region) | Typical grade | Time in canyon | Highlights | Best season |
|---|---|---|---|---|
| Barranco de Formiga (Sierra de Guara, Huesca) | V2 A3 II |
3–4 h | Short rappels (≤12 m), clear pools, sculpted limestone | Late spring–early autumn |
| Río Verde – Lower Section (Otívar, Granada) | V3 A3 II |
3–4 h | Slides, jumps (≤7 m, optional), emerald water | Spring–autumn, avoid spates |
| Barranc de Bòixols (Pre-Pyrenees, Lleida) | V2 A2 II |
2–3 h | Natural slides, short drops, warm rock | Late spring–autumn |
| Maimona Inferior (Montanejos, Castellón) | V2–3 A3 II |
3–4 h | River trekking, one modest rappel, hot springs nearby | Spring–autumn, watch storm runoff |
- Formiga sits near Panzano, ~40 minutes from Huesca; it’s a benchmark for first-timers with beautiful narrows.
- Río Verde (lower) is popular on Costa Tropical holidays; guided options abound from Granada and Almuñécar.
- Bòixols offers friendly moves and sunshine near Coll de Nargó, ~2.5 h from Barcelona by car.
- Maimona pairs well with a soak in Montanejos; access is straightforward from Valencia (90–100 minutes).
For exact access points, ask your guide or check local topos; Formiga’s parking is near 42.217°N, 0.255°W (approximate).
When to go: seasons and water conditions
Water level and temperature define your day. Spring to early autumn works best in most Spanish canyons, with May–June and September–October often ideal for stable flows and mild water. After heavy rain or rapid snowmelt, water can surge, creating strong currents and cold shock risk; postpone if forecasts show convective storms or a sudden temperature drop at altitude.
- Check official weather: AEMET (Spain’s state meteorology) posts daily warnings; look for rainfall alerts in your exact valley.
- Verify flows where gauges exist: SAIH networks (e.g., SAIH Ebro for Huesca) display river levels; a sharp rise is a red flag.
- Ask locally: park information centers and licensed guide companies update conditions daily during season.
- Water temperature: expect 10–16°C in mountain canyons in spring; a 5 mm wetsuit helps. In hot summer, some pre-Pyrenean streams warm to 18–20°C.
If in doubt, pick a drier canyon (less aquatic) or reschedule—conditions, not the calendar, decide.
How to get there and where to stay
Most trailheads are easier by car, though many guided trips offer transfers from nearby towns. Plan extra time: mountain roads are slow, and group departures won’t wait.
- Getting there:
- Car: allow 30–60 minutes from the nearest town to the parking due to narrow roads.
- Public transport: buses get you to hubs like Huesca, Lleida, or Granada; guides often arrange last-mile pick-ups.
- Meeting points: common spots are village squares or petrol stations with easy parking; your guide will confirm a pin.
- Parking:
- Respect signed spots; don’t block farm tracks.
- Leave nothing visible in cars; bring valuables with you in a dry bag.
- Staying nearby:
- Campings with bungalows near canyons (e.g., Alquézar, Montanejos).
- Rural guesthouses (casas rurales) run by local families—good breakfasts and early starts.
- Simple hostales in regional towns if you want services and restaurants.
If you’re planning your first canyoning route without a guide, book accommodation within 30 minutes of the trailhead and budget 60–90 minutes total for meet, approach, and gearing up.
Permits, local guides and busy seasons
Some protected areas require permits, group-size limits, or seasonal closures for wildlife. Sierra y Cañones de Guara regulates specific canyons and nesting cliffs; Río Verde requires booking and capacity control by the provincial environment office; Montanejos restricts access during high fire risk. Always check the park website or call the visitor center before traveling.
Why hire local guides?
- Safety and learning: certified AEGM/TD2 canyon guides manage ropes, water reading, and group flow while teaching good habits.
- Access knowledge: they track closures, new anchors, and daily flow changes.
- Community benefit: your booking supports the people maintaining paths, anchors, and rescue contributions.
High season (late June–September) brings more people and limited slots; reserve guides and permits 1–2 weeks ahead on weekends. If you prefer quieter canyons, aim for early morning starts or shoulder months.
Want to skip logistics? Explore carefully selected guided canyoning tours on Picuco and choose a start point that fits your travel plan.
Gear and Preparation That Make the Difference
The right kit keeps you warm, protected, and confident. Neoprene hugs your skin as cool water slips past without stealing your heat.
Essential gear (harness, helmet, wetsuit, descender)
Your core equipo—canyoning equipment designed for water and abrasion—includes:
- Helmet: CE EN 12492 (mountaineering) or EN 1385 (watersports); snug fit, adjustable cradle, drainage holes.
- Harness: canyoning-specific with reinforced seat and gear loops; size it to wear over a wetsuit.
- Wetsuit: 5 mm full-body for spring mountain canyons; 3–4 mm short-john + jacket in warm summer or southern canyons.
- Socks and gloves: 3 mm neoprene socks reduce heat loss and prevent blisters; thin neoprene gloves protect hands in cold water.
- Descender device: dedicated canyon descenders (e.g., Pirana, Oka, ATS) give friction control on wet ropes; pair with an auto-locking HMS carabiner.
- Lanyard (cow’s tail): dynamic rope lanyard with two arms and locking carabiners for clipping at anchors.
When to buy vs. rent:
- Rent if you’re trying canyoning for the first time or traveling light; most guided trips include helmet, harness, wetsuit, and descender in the price.
- Buy personal layers you’ll reuse (base layer, neoprene socks) for comfort and hygiene.
- Check gear condition: intact stitching, no deep cuts in the wetsuit, functioning buckles, and smooth carabiner action.
If you carry the rope (usually the guide does), choose semi-static canyon rope 9–10 mm with a rope bag that drains and throws cleanly.
Optional gear, rentals and travel-light alternatives
Useful add-ons improve comfort and safety without breaking the bank:
- Footwear: canyoning boots with sticky rubber and draining uppers; sturdy approach shoes with good traction work for easier, drier routes.
- Dry bag and barrel: a 5–10 L roll-top bag inside a perforated canyon pack keeps snacks, phone, and car keys dry.
- Rescue knife: a compact blunt-tip knife for rope entanglement emergencies; attach to harness but use only when trained.
- Thermal extras: a 2 mm neoprene vest under your suit adds warmth for long swims or spring flows.
- Sunscreen and lip balm: mineral, water-resistant types; apply on neck and face before suiting up.
Where to rent:
- Guide companies near hubs (Huesca, Lleida, Granada, Valencia) rent full kits for ~20–35 € per day; guided prices (45–80 € per person) usually include equipment.
- Choose providers with clear gear lists, sizes, and recent photos; ask about suit thickness and helmet certification.
- Travel-light swaps: if you don’t want to buy canyon boots, pair old trail shoes with neoprene socks; for dry storage, double-bag with freezer zips inside a small dry bag.
Pack snacks in small portions and use a soft flask (500–750 ml); rigid bottles clatter and snag inside tight packs.
Fitness and basic techniques to practice
You don’t need to be an athlete, but you should move comfortably on uneven, wet ground for several hours.
Recommended base:
- Endurance: 60–90 minutes of brisk hiking or easy running per week for three weeks before your trip.
- Lower-body strength: step-ups, lunges, and calf raises (3 sets of 12–15) build control on slippery boulders.
- Core and shoulders: planks and band rows help stability when handling ropes or swimming.
Techniques to learn (intro level):
- Controlled descent: practice a gentle rappel on a climbing wall under supervision to feel friction and stance.
- Simple knots: figure-eight follow-through, overhand on a bight, and clove hitch—just enough to clip safely and tie backup knots.
- Rope handling: coil and feed rope from a bag, keep rope out of water flow, and lock off a descender (mule-overhand) if shown by a guide.
If possible, take a half-day introductory course or arrive early for a practice rappel with your guide at a roadside anchor.
What Your First Canyoning Day Actually Looks Like
Knowing the flow of a day removes guesswork and nerves. Sun warms the trail as the canyon’s cool breath rises from below.
Step-by-step of a typical route
Here’s a realistic timeline for a beginner-friendly outing on guided canyoning tours:
-
Meet and gear up (0:00–0:45)
- Meet at the agreed point at 9:00–9:30; sign waivers and review medical info.
- The guide checks sizes, fits harness and helmet, and issues wetsuits and packs.
- Briefing covers route plan, signals, and what to do at each obstacle.
-
Approach hike (0:45–1:20)
- Easy walk 20–40 minutes to the entry, with a water and snack pause.
- The guide sets expectations: estimated time inside (2–3 hours) and exit plan.
-
Entry and first moves (1:20–1:40)
- You seal up your wetsuit, stash small items in a dry bag, and clip lanyards.
- First obstacle is simple: a short slide or a low rappel with a backup rope.
-
Canyon progression (1:40–3:30)
- One at a time through rappels, slides, and knee-deep wades; pool swims are short.
- The guide manages ropes and spots landings; you keep distance and rotate smoothly.
- Photos and breaks happen at sunny pools; everyone snacks and hydrates.
-
Final section and exit (3:30–4:10)
- A last rappel or slide ends the technical section; you coil ropes and peel wetsuits at a sunny spot.
- A 15–30 minute walk returns to vehicles.
-
Debrief (4:10–4:30)
- The group recaps highlights and lessons; the guide logs times and conditions.
- You rinse gear if facilities exist, then change and head for a late lunch.
For canyoning for beginners, guides tune pace and obstacle choices so you’re challenged, not overwhelmed. Expect options to downclimb or take a “dry line” if an obstacle feels too much.
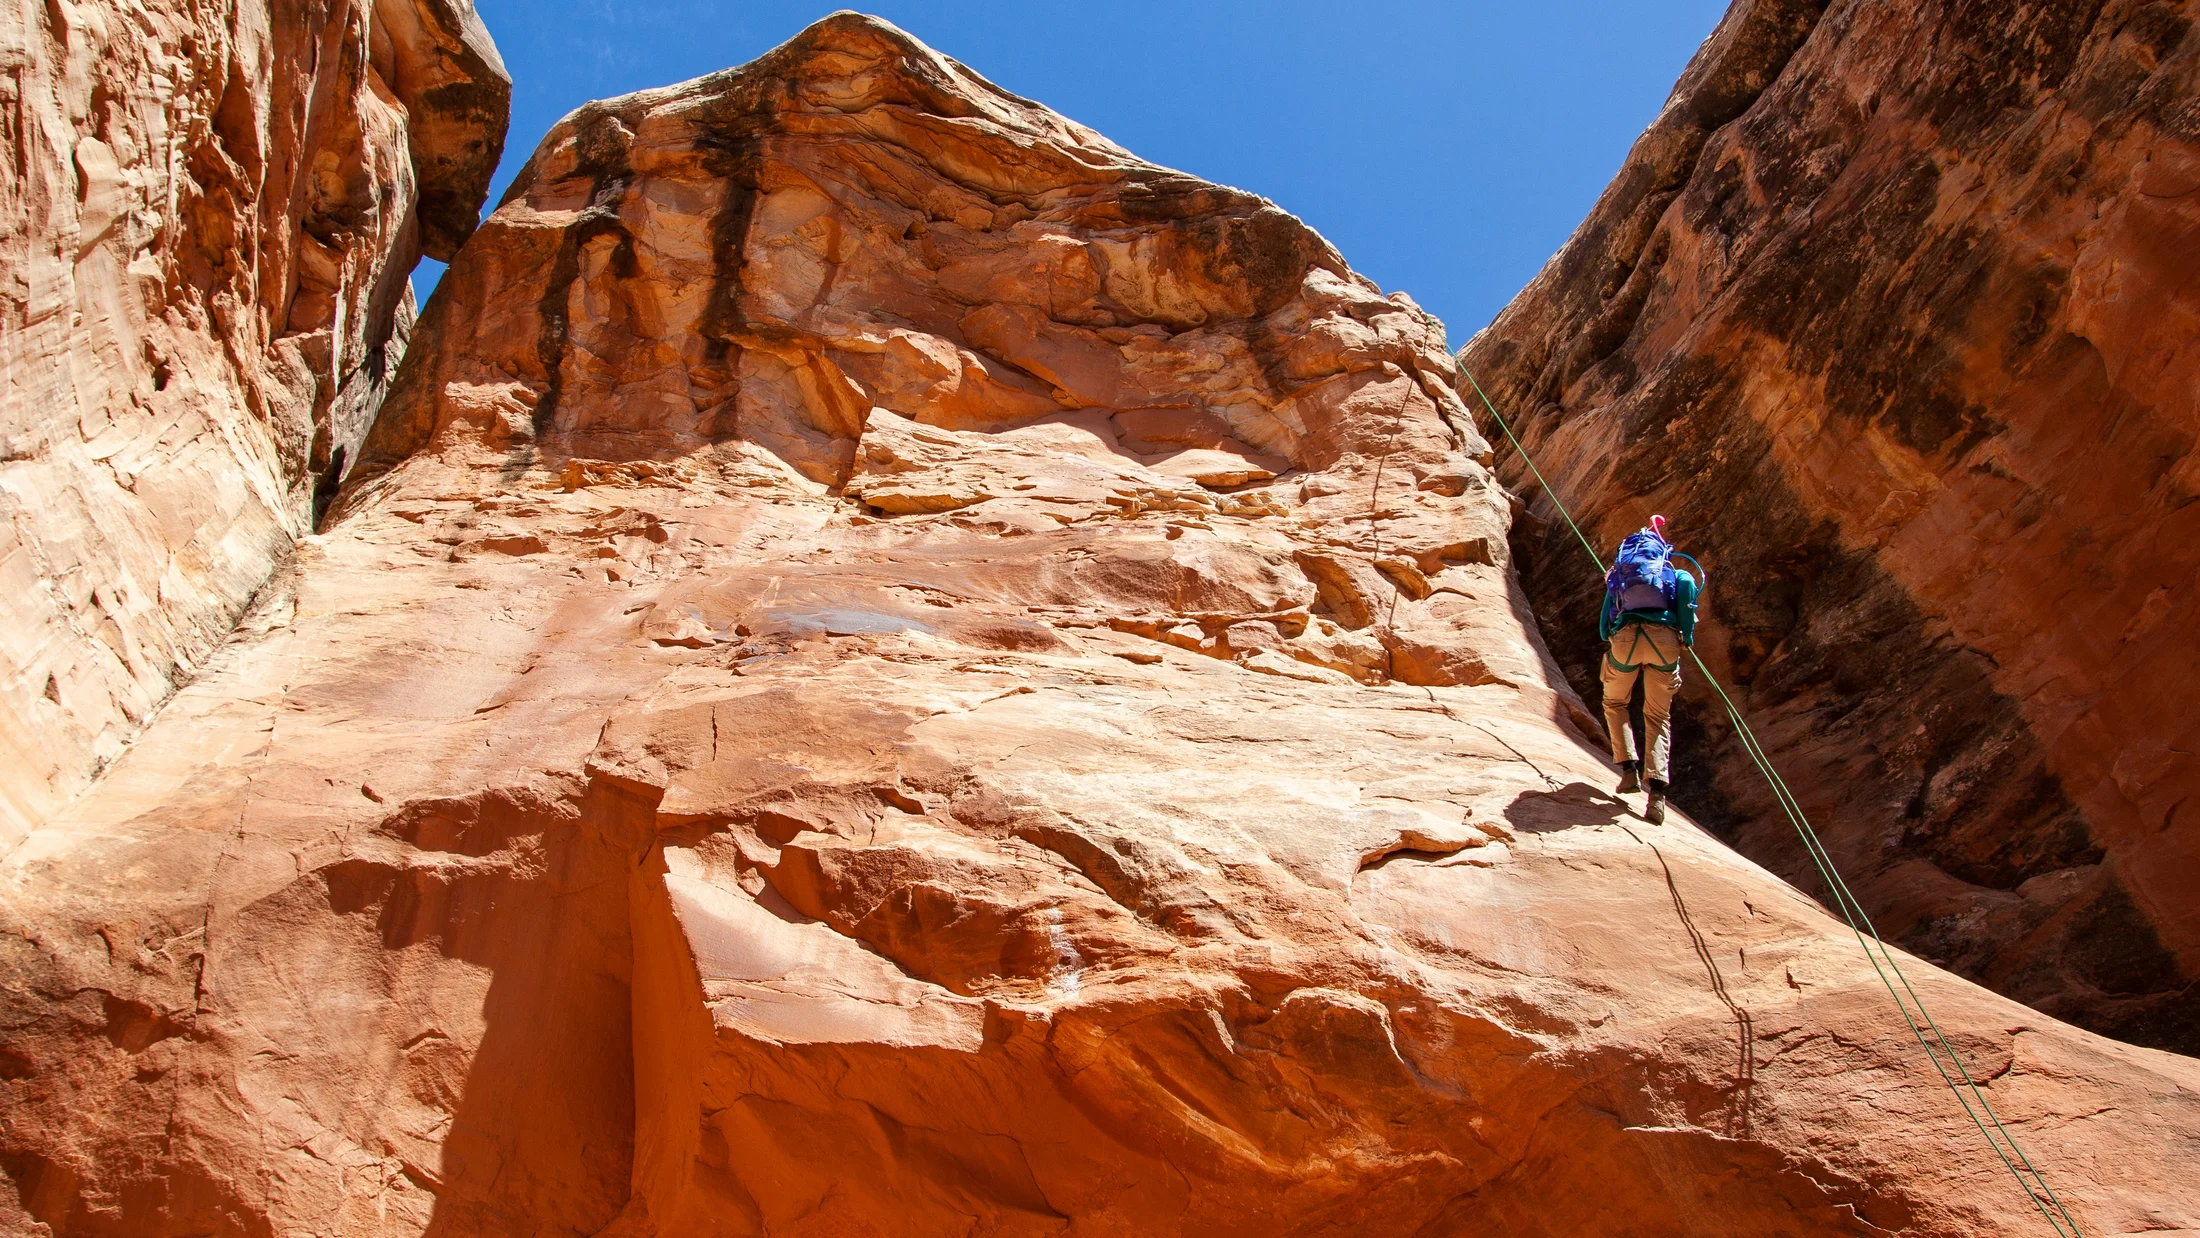
Activities and obstacles: rappels, jumps and slides
-
Rappels: descending a rope anchored to rock or a bolt line.
- Why: safe control on drops where jumping or downclimbing isn’t appropriate.
- Beginner difficulty: short (6–12 m) with a backup belay from the guide.
- Tips: keep feet shoulder-width, lean into the wall, look where you’ll step, and communicate before weighting the rope.
-
Jumps: stepping into a pool from a ledge, aiming for a clear landing zone.
- Why: quick, fun option where depth and landing are verified by the guide.
- Beginner difficulty: 1–3 m to start; higher jumps are always optional.
- Tips: wait for a clear “go,” jump feet-first, arms crossed over chest, and never dive; step aside immediately after surfacing.
-
Slides (toboggans): natural water-polished chutes you slide down.
- Why: efficient and playful passage on smooth rock.
- Beginner difficulty: gentle angles, short lengths; the guide shows body position.
- Tips: lie flat, heels up, hands across chest or protecting helmet, and commit to the line the guide marks.
If fear spikes, pause, breathe, and ask for a lower option; a careful downclimb or a guided rappel is a valid choice. The guide’s signals and voice cues are your green light.
Variants by level and easy route options
Beginner canyons often offer two tracks at an obstacle: an “airy” line with a short rappel or jump, and a “dry” path around it. You can mix and match based on your comfort and energy. To progress, choose routes that add one new element—slightly longer rappel or a longer swim—without stacking difficulties all at once.
For your first outing, keep choices anchored in rutas fáciles barranquismo criteria:
- Vertical: short drops with secure stances and bolted anchors.
- Aquatic: calm pools, no siphons or hydraulics, and short swims.
- Escape: visible paths around obstacles and clear exits midway.
- Group flow: capacity for safe spacing and good rest spots.
Once you feel solid, step up to a route rated one notch higher in either vertical or aquatic complexity, not both.
Staying Safe: Risk Management and First Aid
Canyons are beautiful because they concentrate water, rock, and gravity—respect all three. The thrum of distant water warns of a drop before you see the lip.
Common risks and how to prevent them
Know the main hazards and the simple moves that reduce them:
- Slips and falls: wet, polished rock is slick.
- Prevention: deliberate foot placement, three points of contact, soft knees, and sticky-soled shoes.
- Impacts and scrapes: knees, shins, and elbows hit edges.
- Prevention: wear a full wetsuit, place hands on solid holds, slide in control, and keep distance between participants.
- Entrapment: feet or limbs stuck between boulders or in logs (strainers).
- Prevention: never wedge feet in the current, swim defensively with feet up, and avoid debris chokes.
- Hydraulics and siphons: circulating holes or water pulled under rock.
- Prevention: beginner routes should avoid them; if present, guides bypass or belay; you never enter unknown pour-overs.
- Hypothermia and fatigue: cold water drains energy.
- Prevention: adequate neoprene, keep moving, snack often, shorten swims, and exit early if shivering or clumsy.
- Rising water: storms or dam releases spike flows.
- Prevention: check forecasts and flow gauges; watch for sudden water discoloration, floating debris, or a rising waterline; abort immediately if any appear.
Abort criteria are clear: thunder nearby, water rising or turning brown, equipment failure (lost descender/helmet), an injury affecting mobility, or fear impairing decision-making. The safest choice is to leave the canyon before conditions deteriorate.
Group protocols, communication and basic rescue
Structure keeps people safe in narrow, noisy spaces:
- Roles: one leader (guide) sets order; a strong participant may act as tail.
- Spacing: one person at a time in the fall line; only one on rope except when belaying.
- Safe spots: move from obstacle to a designated eddy or ledge; clear the landing zone fast.
- Signals:
- Whistle: 1 blast stop, 2 blasts go, 3 blasts help.
- Hand: arm up and circling means “OK,” crossed arms on chest mean “cold/get me out.”
- Ropes:
- The first person (often the guide) tests the line; others wait for “on belay.”
- Keep rope out of main current; coil in a bag to prevent tangles.
Rescue basics for lay participants:
- Throw a rope bag or extend a paddle/pack, never your hand, to someone in gentle current.
- Stabilize at a safe platform, add warmth, and call 112 with location (
GPS coordinatesif possible), number of people, injury type, and access path. - Do not attempt advanced rescues (e.g., in hydraulics); await professionals.
Short practical training—like a half-day with a certified guide—goes a long way toward effective communication and incident response.
First aid specifics and what to carry
A canyon-specific kit lives in a small dry bag within reach:
- Waterproof dressings and steri-strips for cuts.
- Elastic bandage and triangular bandage for sprains and slings.
- Blister care and tape for hot spots.
- Thermal blanket or a compact bothy bag.
- NSAID analgesic and an antihistamine (if tolerated).
- Irrigation syringe and small bottle of clean water for wound flushing.
- Spare high-energy snack and a chemical hand warmer.
Immediate actions:
- Hypothermia: strip wet layers if possible, add insulation, shelter from wind, sip warm drink if safe, and evacuate.
- Cuts: irrigate well, close minor edges with steri-strips, and dress watertight; watch for contamination.
- Sprains or dislocations: immobilize, cool the area (not directly on skin for long), and avoid weight-bearing.
- Head impacts or suspected spine injury: keep the person still, stabilize, maintain warmth, and call 112.
Seek professional help for heavy bleeding, altered consciousness, severe pain, deep lacerations, or any suspected fracture. Document times and treatments for rescuers.
Practical Tips for First-time Canyoneers
Small choices make the day smoother and warmer. The faint scent of pine and neoprene lingers as you shoulder your pack.
Before the route: bookings, clothing and checklist
Lock down the plan for your primera ruta barranquismo 3–7 days ahead:
- Reservations:
- Confirm guide credentials and insurance; share medical conditions and swim comfort level.
- Reconfirm meeting time, location pin, and what’s included (wetsuit thickness, footwear).
- Tell someone:
- Share route name, start time, and expected return; set a check-in window and emergency contact.
- Clothing:
- Swimsuit or base layer under the wetsuit; lightweight synthetic top in cooler conditions.
- Quick-dry shorts for approach and a warm layer for breaks.
- Pack small:
- Soft flask (500–750 ml), compact snack (nuts, bars), sunscreen, personal meds, and ID/cash in a mini dry pouch.
- Car kit:
- Big water bottle, towel, dry clothes, sandals, and a trash bag for wet gear.
Checklist (quick glance):
- Helmet, harness, lanyard, descender, carabiners (if not provided).
- Wetsuit and neoprene socks/gloves.
- Shoes (canyon or sturdy trail shoes).
- Dry bag, snack, soft flask, sunscreen.
- Phone, ID, small cash.
During the route: mindset, communication and group behavior
A good day in a canyon is unhurried and attentive:
- Pace and attitude:
- Move steadily, not fast; keep warm by staying engaged.
- Ask questions, repeat signals, and take each obstacle one at a time.
- Communication:
- Make eye contact with the guide, confirm “OK” before moves, and pass signals down the line.
- If you feel cold or tired, say it early; adjustments are easier before the next obstacle.
- Energy and warmth:
- Snack every 45–60 minutes; keep the wetsuit zipped and the hood up in wind.
- Minimize swims by pushing off edges and aiming for eddies, not the main flow.
- Leave no trace:
- Pack out every wrapper, step on durable surfaces, and avoid shortcuts that erode slopes.
- Respect closures and private land; greet locals and share the path with courtesy.
When nerves rise, name the fear, breathe five slow cycles, and choose the conservative option; confidence grows with clean, controlled moves.
Choosing between guided tours and going on your own
“Tours barranquismo guiados” exist for a reason: they compress years of local knowledge into one safe, fun day. Going independently can be rewarding later, but it carries more planning and responsibility.
- Guided canyoning tours:
- Pros: safety systems, provided gear, efficient group flow, learning by doing, and access to permits.
- Cons: fixed dates and group pace; slightly higher cost (45–80 € per person for beginner canyons).
- Best for: your first 1–3 canyons, new regions, or when conditions are uncertain.
- DIY with experienced friends:
- Pros: full flexibility, lower ongoing costs if you own gear, and deep skill-building.
- Cons: you manage route choice, conditions, anchors, rescue, and group judgement.
- Best for: after formal instruction and a few guided days; start on dry, short, low-flow canyons.
If money is tight, consider a one-day course plus one guided day; you’ll leave with skills that make future DIY outings safer and more enjoyable.
Frequently Asked Questions
What fitness level do I need for a first canyon?
If you can hike 6–8 km with some hills and feel comfortable in water, you’ll be fine on beginner routes. Add a few weeks of light cardio and step-ups, and you’ll enjoy the day far more. Guides pace the group and offer alternatives for tougher moves.
I’m not a strong swimmer—can I still go?
Yes, many beginner canyons have short, calm swims and options to bypass deeper pools. Tell your guide in advance; they may add extra flotation or choose a route with fewer swims. You must be comfortable floating with a wetsuit and following instructions in water.
How much does a guided trip cost in Spain?
Expect 45–80 € per person for half-day beginner canyons, usually including gear (helmet, harness, wetsuit, descender) and insurance. Private groups cost more but allow a custom pace. Photos or transfers may be extra—ask when booking.
What’s the minimum age and are there weight limits?
Many operators accept ages 8–12+ depending on height, comfort in water, and the day’s conditions. Weight/size limits relate to safely fitting helmets, harnesses, and wetsuits—typically up to ~120 kg, but confirm with your provider. Family routes are calmer and shorter.
What if I’m afraid of heights or jumping?
You don’t have to jump. Beginner canyons almost always offer a rappel or downclimb alternative. Let the guide know your limits; they’ll set backup belays and pick conservative lines. Rappels start low and build confidence gradually.
What if the weather turns or the water is high?
Trips may be rescheduled or moved to a safer canyon. Guides monitor AEMET alerts and local flow reports; last-minute changes keep you safe. If you’re on your own, the rule is simple: turn around early—rising, brown, or noisy water is a non-negotiable no-go.
Ready to Take the Plunge?
You now know how to pick a canyon, choose the right season, pack essential gear, and move safely as a team. Canyoning blends simple rope skills, careful water reading, and a steady pace, and your first day should trade intensity for clarity. Warm rock underfoot and a glittering pool ahead hint at why people keep coming back.
Recap your checklist:
- Choose a beginner-friendly route with calm pools, short rappels, and clear escapes.
- Time your outing for stable weather and moderate flows; verify with AEMET and local sources.
- Bring focused canyoning equipment: helmet, harness, proper wetsuit, and sticky, draining shoes.
- Move one at a time, use clear signals, and keep snacks handy for warmth and focus.
- Respect the place and people: follow permits, seasonal closures, and leave no trace so communities can keep sharing these canyons.
If you want an easy start, book a local guide for your first canyon; you’ll learn faster and worry less. Prefer to prepare on your own? Begin with a short, dry-leaning canyon and a reliable partner, and practice knots and descents beforehand. Either way, set a date, confirm the meeting point, and pack your small dry bag tonight.
Download our first-time canyoning checklist on Picuco and connect with trusted local providers to turn your plan into a safe, memorable day in the water.