Why Learning from Common Hiking Mistakes Changes Your First Mountain Day
Your first day in the mountains should feel exciting, not stressful. Most first-time “hiking mistakes” are preventable with simple choices about route, weather, footwear, and navigation. Rescue teams across Europe and Spain (GREIM, Mountain Rescue England and Wales, Alpine clubs) regularly report the same patterns: poor planning, bad shoes, and misread forecasts. In this guide you’ll learn how to avoid them with practical steps, clear examples, and short checklists you can use right away. Imagine the clean bite of pine-scented air as the path opens to a quiet ridge.
You will find how to pick a beginner-friendly route, what to bring hiking without overloading yourself, and how to read a mountain forecast that actually helps you decide. We’ll cover pacing, hydration, simple trail navigation tips, and respectful behavior on shared land kept by local farmers, shepherds, and trail volunteers. Expect precise tools: Naismith’s Rule for timing, basic map-and-compass orientation, and reliable weather services (AEMET for Spain, MeteoBlue, Mountain-Forecast). The aim is confidence: fewer unknowns, more joy, and a safer return before dusk.
Use the section checklists before you leave home, double-check the weather the evening prior, and send your plan to a friend with your car park and return time. Small habits cut risk dramatically and raise enjoyment even more. By the end, you’ll be able to pick the right trail for today, pack light but smart, and keep a steady pace that leaves you smiling at the finish. That’s the quiet win every beginner deserves.
Picuco te puede ayudar
Does something here catch your eye?
Tell us.
Write to us on WhatsApp or email: we answer questions, find the best options and help you sort out the booking.
Getting Oriented: Where to Go, When to Go, How to Get There, and Where to Stay
Location and beginner-friendly route types
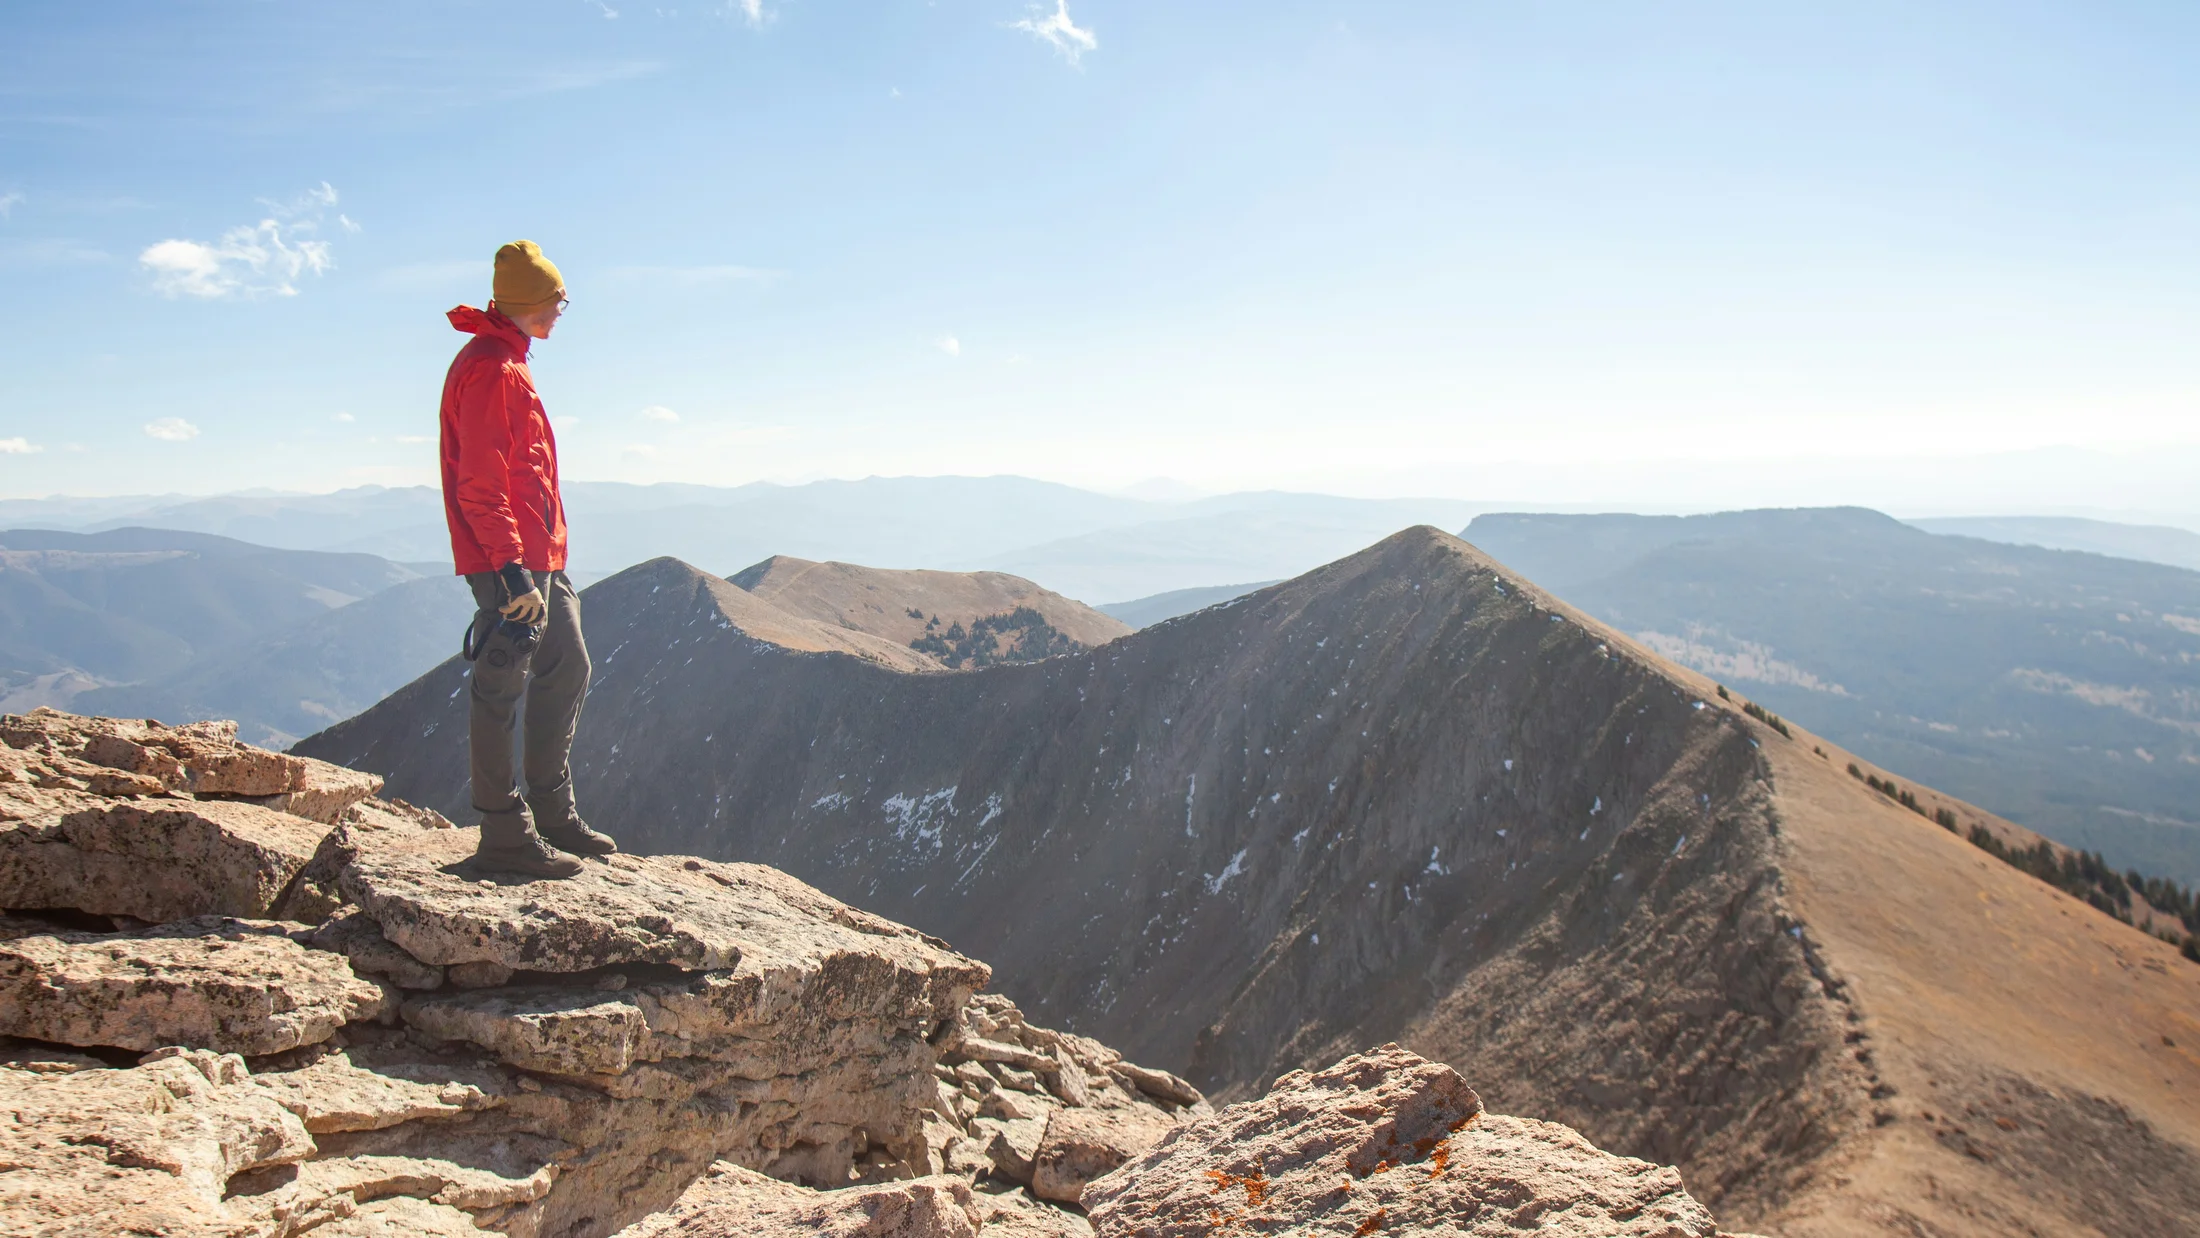
Start in regions with easy access, stable footpaths, and modest altitude so your first outing is about learning, not suffering. Look for routes with total ascent under 400–600 m, distances of 6–12 km, and well-marked trails (PR short-distance paths or family loops near villages). Picture a soft gravel path winding through oak woodland with cowbells faint in the distance.
Choose circular routes to simplify logistics and avoid the beginner hiking mistakes of missed buses or complex shuttles. Prefer trailheads close to towns with services, ideally under 90 minutes from your base. Read trail descriptions carefully: exposure means steep drop-offs; scrambling means using hands; scree is loose rock that rolls underfoot. If those terms worry you, pick gentler terrain like forest tracks, valley bottoms, or lakeside paths. Scan recent condition reports on official park pages and local hiking clubs. For Spain, seek PR or SL paths in natural parks, and avoid unmarked summits until you’ve built skills. The simple rule: let your first hills teach you, not test you.
When to go: seasons and forecast to avoid surprises
Spring and autumn offer cool temperatures, longer daylight, and fewer storms—prime time for easy routes. Summer can be fine at altitude but brings heat and thunderstorms in mid-afternoon; winter adds snow, ice, and short days that multiply risk. Early mornings mean quieter paths, firmer ground, and generous buffers for breaks. The smell of damp earth after dawn often signals a stable day starting well.
Check the mountain forecast the evening before and again at breakfast. Look beyond “sunny/cloudy” to wind speed, freezing level, precipitation probability, and storm risk. As a rule, winds above 40–50 km/h on exposed ridges make beginners uncomfortable; sub-zero windchill demands more layers and shorter ambitions. In Spain, consult AEMET’s mountain bulletins; compare with MeteoBlue or Mountain-Forecast for a second opinion. If forecasts diverge, choose the lower, sheltered route or postpone. Your first success is returning early and content, not forcing a summit under dark clouds.
How to get there: transport and access to the trailhead
Work out “how to get there” and, crucially, how to get back, before lacing your boots. Driving gives flexibility, but shared transport and rural buses can work with careful timing. In many valleys, weekend buses arrive late morning and leave mid-afternoon; plan a loop of 3–5 hours and stand back at the stop 15 minutes early. A breeze pushing through roadside poplars often hints at weather higher up.
Parking tips:
- Arrive early; small mountain lots fill by 10:00.
- Never block farm tracks or gates.
- Note trailhead coordinates in your phone and on paper.
Avoid the common error of forgetting your return: set a turnaround time (for example, 13:30) regardless of distance covered. If using ride-hailing, check signal coverage first; reception often fails in valleys. Where a forest track leads to the start, ask the local council or park office if access restrictions apply on weekends or after rain. Logistics done right keep the focus on the walk, not a taxi that never comes.
Where to stay: refuges, villages, and campsites
Staying near the trail shortens the morning rush and adds a taste of local life. You’ll find three main options: village guesthouses, basic campsites, and staffed mountain refuges on popular routes. The warm smell of wood smoke from a village café at first light can set the day at ease.
- Villages: Ideal for your first trip—easy meals, water, and bus stops. Ask about trail conditions at the bar; locals often know closures or livestock presence.
- Campsites: Good in summer if you’re comfortable outdoors; check quiet hours, shade, and potable water.
- Refuges: Many require bookings in season; they offer bunk beds, dinner, breakfast, and trail advice. Confirm payment methods and opening dates.
Reserve weekends 1–3 weeks ahead in spring and autumn, longer in holiday periods. Pick accommodation within 15–30 minutes’ drive or bus of your trailhead to reduce pre-hike stress. Always ask about early breakfast or a takeaway sandwich, and confirm if late arrivals are allowed—good information prevents a string of beginner mistakes before you even start.
What to Expect on Your First Mountain Outing
Expect a day that feels longer than the numbers suggest. Trail time expands with breaks, photographs, navigation checks, and friendly chats with shepherds or other hikers. A realistic first route lasts 3–5 hours moving time, with 45–90 minutes of pauses layered in. Under trees, your breath may cloud softly in the cool shade even as sunlight warms the path ahead.
Pacing matters more than speed. Use simple rules: walk at a pace that allows full sentences in conversation; shorten steps on climbs; take micro-breaks of 30–60 seconds every steep pitch. Naismith’s Rule helps plan time: allow 1 hour per 5 km plus 1 hour per 600 m of ascent, then add a 25–40% beginner margin for photos, learning navigation, and snack stops. Terrain modifies everything: rocky, rooty, or muddy sections slow you; wide forest tracks speed you up.
Mountain weather shifts quickly. Even on blue-sky mornings, cloud can build, wind can sting on ridges, and a short shower can cool you fast. Pack a light, compressible waterproof and a warm mid-layer even in summer; on breezy tops, temperatures can feel 5–10°C colder than in town. If thunder features in the afternoon forecast, start early, keep your route lower, and aim to be back by midday.
Group dynamics play a part. The true group pace is the pace of the slowest hiker. Put the steadiest navigator in front to avoid the “accordion” effect, agree on rest points, and check-in regularly for hot spots on feet, low energy, or creeping doubt. Novice confidence grows with small successes: finding the right junction, eating before you feel low, and turning around on time when the day asks for it. The mountains will be there tomorrow, and every day you finish happy is a good day.
The 10 First-time Mistakes Most of Us Make—and How to Avoid Them
1.Not planning the route: underestimating distance and ascent
This is the classic among hiking mistakes: numbers on a screen feel small until your calves protest halfway up. Underestimation happens when we ignore ascent, terrain, and breaks, or we trust optimistic community times without adding a beginner buffer. A sunlit meadow that looked close on the map can take an hour on stony switchbacks.
Key steps:
- Use Naismith’s Rule: 1 h per 5 km + 1 h per 600 m ascent; add 25–40% margin for beginners.
- Check total ascent (“elevation gain”) and the steepest kilometer; steep sections decide the day.
- Read terrain notes: “rocky,” “scree,” “muddy,” or “exposed” all slow you.
Red flags:
- GPX shows repeated tight contour lines—expect tough climbs.
- Estimated time under 3 hours for 12 km with 600 m ascent—too optimistic for a first day.
- No alternate exit or turnaround point marked.
Mini-checklist (print or save):
- Distance, ascent, steepest segment noted.
- Turnaround time set (e.g., 13:30).
- Bail-out points or shorter loop identified.
- Sunset time checked; headlamp packed even for day hikes.
Example: A 10 km loop with 500 m gain looks “easy,” but if 350 m climb stacks in 2 km, it will feel hard. Reorder your expectations, and you’ll reorder your experience.
2.Choosing a route too ambitious for your current level
Ambition is great, but the mountain is not a gym with padded floors. Routes can be “hard” for three reasons: steep ascent, technical terrain, or exposure. Your first hikes should keep all three modest. On a breezy ridge where larks rise and drop, the edge often feels sharper than it looks on the topo.
How to judge difficulty:
- Distance: 6–12 km is a good first window.
- Ascent: keep under 400–600 m until pacing feels natural.
- Terrain: start on firm paths; postpone scree, boulder fields, and hands-on sections.
- Exposure: avoid narrow ridges and cliff-edge traverses.
Adapt the plan:
- Swap the summit for a mid-mountain viewpoint.
- Choose out-and-back routes so you can turn around anywhere.
- Have a lower, sheltered option bookmarked for windy or stormy forecasts.
Progression strategy:
- Three outings on easy, well-marked trails with 200–400 m gain.
- Two outings adding mild rockiness and 500–600 m gain.
- Introduce a short, non-exposed ridge walk on a settled day.
- Try a longer day (12–15 km) with early start and refined packing.
If the topo shows long cliff lines and the description mentions “airy traverse,” save it. You’ll enjoy it more after your foundation is set.
3.Wearing the wrong footwear: ignoring grip and fit
City sneakers often slip on wet rock and roll on loose gravel, and that’s when blisters and twisted ankles visit. Proper footwear has two jobs: protect your feet and grip the ground. New shoes straight out of the box can still cause hot spots. The earthy smell after rain also means slick roots that punish thin, flat soles.
What to choose:
- Trail shoes for well-made paths and dry seasons; they’re lighter and flexible.
- Mid or high-cut boots for rocky, muddy, or mixed terrain; they stabilize ankles and shield toes.
- Look for a grippy outsole pattern (deep lugs), a firm midsole, and toe protection.
Fit tips:
- Try in the afternoon when feet are slightly swollen.
- Wear your hiking socks; check a thumb’s width in front of the toes on descents.
- Lace for heel lock to prevent rubbing.
Break-in plan:
- Walk 2–3 short urban sessions, then a 4–6 km park loop with a small hill.
- Tape known hot spots before the first longer hike.
- Carry blister care: tape, hydrocolloid plasters, and antiseptic wipes.
Avoid cotton socks that hold moisture; choose wool or synthetic blends that wick and cushion. Your feet carry your day—treat them like the precious gear they are.
4.Skipping the weather check or misreading the mountain forecast
Weather in town is not the weather on the ridge. A sun icon in the general forecast can hide strong winds, low cloud, or afternoon thunderstorms on higher ground. Reading a mountain forecast is a skill; it guides what to wear, when to start, and whether to go. The quicksilver flicker of a high cloud deck can warn of change hours before rain arrives.
Trusted sources:
- Spain: AEMET mountain bulletins for key ranges.
- Cross-check: MeteoBlue, Mountain-Forecast, or official park pages.
Parameters that matter:
- Wind: 40–50 km/h on exposed ridges is unpleasant for beginners.
- Temperature and windchill: subtracts comfort quickly.
- Freezing level: ice persists above it, even under sun.
- Precipitation probability and timing: showers or storms?
- Thunderstorm risk: especially in warm months, build from midday.
If weather turns:
- Drop elevation and avoid ridges or summits.
- Put on a waterproof and warm layer early; heat lost is hard to regain.
- If thunder: avoid high points, solitary trees, and metal structures; spread the group out.
Plan B:
- Lower valley loop or forest trail in wind or storm forecasts.
- Move the start 1–2 hours earlier in summer to beat heat and storms.
The mountain will wait; your good call today brings many good days tomorrow.
5.Carrying too little—or far too much—gear
Both extremes cause problems: missing essentials raise risk, while overloaded packs drain energy and morale. The sweet spot is a light, complete kit that fits the day’s forecast and terrain. A neatly packed bag that rustles softly when you shrug it on signals calm preparedness.
Minimum day-hike kit:
- Navigation: charged phone with offline maps, paper map, compass.
- Clothing: waterproof jacket, warm layer, sun hat, gloves in shoulder seasons.
- Hydration: 1.5–3 L water depending on heat, plus electrolytes.
- Food: 200–300 kcal per hour planned.
- Light: headlamp with fresh batteries.
- First aid: blister care, bandage, tape, pain relief, personal meds.
- Sun and skin: SPF 30+, sunglasses, lip balm.
- Extras: whistle, small knife or multitool, emergency blanket.
Weight control:
- Ditch duplicates and “just in case” heavy items not justified by the forecast.
- Decant liquids and creams into small containers.
- Share group items (repair tape, power bank) to reduce redundancy.
Common errors:
- No headlamp on a “short” hike that runs long.
- Bulky cotton hoodie instead of a warm, light fleece.
- Single 500 ml bottle on a hot day with no refill points.
Pack for the real day, not the imagined one, and you’ll walk lighter and safer.
6.Poor hydration and fueling: energy dips you could avoid
Dehydration and low energy sneak up slowly, then all at once. Early signs include dry mouth, less frequent urination, irritability, and a pace that keeps slipping. Good planning spaces intake through the day, not in big, late gulps. The bright snap of a fresh orange on a sunlit rock can revive body and mind.
Hydration basics:
- Aim for 0.4–0.8 L per hour in mild weather; 0.6–1.0 L in heat.
- Add electrolytes on hot days or long climbs; sodium helps retain fluids.
- Start hydrated: drink a glass of water with breakfast.
Fueling rules of thumb:
- 200–300 kcal per hour on the move.
- Mix slow and fast energy: nuts, trail mix, oat bars, bananas, dates, sandwiches.
- Eat before you feel hungry; set a timer if needed.
Practical setup:
- Use two soft flasks or a 2 L bladder plus a 0.5 L bottle with electrolytes.
- Keep snacks in hip pockets for easy access.
- Plan a 10-minute “real food” stop every 90 minutes.
Red flags and fixes:
- Headache, chills in heat, or sudden fatigue: sip fluids, add electrolytes, slow down in shade.
- Nausea: small sips and gentle carbs, consider a longer rest.
Hydration mountainside is a habit, not a hero move—small, steady sips win the day.
7.Not telling anyone your plan or carrying identification
If something goes wrong, time matters. Telling a trusted person your plan and carrying ID speeds help and calms worry. Rural communities and rescue teams are efficient when they have clear information. The quiet ring of a village church bell at noon can mark your scheduled check-in.
What to share before you go:
- Route name or GPX, start point (coordinates), intended direction.
- Group size and names, vehicle model and plate.
- Start time, turnaround time, latest expected return.
- Emergency numbers relevant to the country (e.g., 112 in Spain).
Simple message template:
“Hi [Name]. We’re walking the PR-15 loop from [Trailhead, coordinates] clockwise. Start 09:00, turnaround 13:30, back by 16:30. Car: [Make, color, plate]. If no message by 18:00, call 112.”
What to carry:
- Photo ID and health card or copy.
- Emergency contact on paper and set as “ICE” in your phone.
- Small card listing allergies, meds, and conditions.
Check-in habit:
- Send a short “Started now” message at the trailhead.
- Confirm “Off trail and OK” at the end.
Most problems become stories, not searches, when someone knows where to start looking.
8.Relying only on your phone for navigation
Phones are wonderful until batteries drain, apps crash, or signals vanish in a steep-walled valley. Losing the path is among the most common beginner hiking mistakes—and the easiest to prevent. A paper map that creaks lightly when unfolded pairs perfectly with a compass that needs no charging.
Build redundancy:
- Download offline maps for the area before you travel.
- Carry a paper map and a simple baseplate compass.
- Pack a small power bank and cable.
App tips:
- Use airplane mode to save battery; GPS still works.
- Drop waypoints at key junctions and water sources.
- Keep screen brightness low; lock the phone when walking.
Analog skills:
- Learn to orient the map to the land using the compass.
- Read contour lines to predict climbs and descents.
- Follow waymarks but confirm with the map at each major junction.
If lost:
- Stop and breathe; errors multiply when rushing.
- Backtrack to the last known point.
- If visibility drops, avoid wandering; call for advice early if needed.
Tech is a tool, not a guarantee. Two simple backups turn confusion into confidence.
9.Mismanaging pace and breaks: avoidable exhaustion
Starting too fast spikes your heart rate and drains legs early. A steady, conversational pace preserves energy and mood. Short, regular rests beat long, infrequent collapses. On hot days, shade feels like silk on the skin and is worth five minutes of patience.
Pacing principles:
- You should talk in full sentences while moving.
- Shorten stride, increase cadence on steep ground.
- Ease slightly below your limit; your “all-day pace” feels almost too slow.
Break strategy:
- Micro-breaks: 30–60 seconds during climbs to lower heart rate.
- “Ten every ninety”: 10-minute snack and adjust stop every 90 minutes.
- Keep big layers on during rests to avoid cooling.
Group tactics:
- Leader sets a sustainable pace for the slowest walker.
- Regroup at all junctions; no one passes a turn until all arrive.
- Rotate who leads to share mental load.
Warning signs:
- Trip frequency rising, grumpiness, poor foot placement; slow down, fuel, drink.
- Cold sweat or dizziness: stop in shade, hydrate, eat simple carbs, reassess the plan.
Finish with energy in the tank, and you’ll want to return next weekend.
10.Ignoring signs, leaving the path, or forgetting basic respect
Mountains are shared spaces—by wildlife, grazing animals, forestry crews, and locals whose work keeps trails open. Straying off-path erodes soil, harms plants, and raises your risk of getting lost. A lark rising from heather and the faint clack of cowbells remind you the path crosses someone’s livelihood.
Stay smart and kind:
- Follow waymarks and posted signs; they exist for safety and conservation.
- Keep gates as you found them; give livestock wide space and a calm voice.
- Yield politely on narrow paths; uphill hikers have right of way.
Environmental care:
- Pack out all litter, including tissues and fruit peels.
- Stick to durable surfaces; avoid trampling alpine meadows.
- Keep noise down near farms and wildlife areas.
Legal and seasonal notes:
- Some routes close during fire risk or nesting seasons; check local notices.
- Dogs often must be leashed; confirm rules at the trailhead.
If a sign warns of closure or danger, respect it; detours are there for a reason. Good behavior keeps landscapes healthy and communities welcoming.
Essential Clothing and Gear for Beginners
Footwear: types and how to choose for the route
Shoes are part of your “equipo senderismo” that matter most because they connect you to the ground. For maintained trails in dry seasons, trail-running shoes with aggressive lugs and a rock plate can be perfect. For rocky, muddy, or shoulder-season terrain, mid or high-cut boots bring stability and protection. The soft rasp of rubber on stone tells you grip is working.
Key features:
- Outsole: deep, varied lugs for grip on mud and rock.
- Midsole: enough stiffness to guard from sharp stones; too soft tires your feet.
- Upper: breathable in heat, waterproof membrane in wet, cooler months.
Fit and testing:
- Try with hiking socks; toes should not hit the front on descents.
- Heel should stay locked; use runner’s loop lacing if needed.
- Break in over 2–3 shorter walks before your first full day.
Care:
- Brush off dirt, dry naturally, and reproof waterproof models occasionally.
- Replace insoles if they pack down; comfort returns for little cost.
The right shoe for today’s terrain beats a “do-everything” promise every time.
Layering made simple: staying warm, dry, or cool
A good layering system adapts to weather, effort, and altitude. Think in four parts: base, thermal, insulating, and shell. A cool upland breeze across your sleeves can turn pleasant to chilly in a minute—layers make the difference.
- Base layer: wicks sweat; merino or synthetic. Avoid cotton.
- Thermal layer (optional): adds warmth for cold starts; thin grid fleece works well.
- Insulating layer: fleece or lightweight synthetic puffy for stops and summits.
- Shell: waterproof-breathable jacket with hood; pit zips help in rain and effort.
How to combine:
- Mild, dry day: base + light fleece; shell packed.
- Windy ridge: base + fleece + shell on early.
- Summer storm risk: base + light fleece packed + reliable shell always handy.
Accessories:
- Sun hat and sunglasses in all seasons.
- Light gloves and buff from autumn to spring.
Test your system on a local walk before the mountain. Adjust pieces so you can add or remove without a full stop.
Backpack and smart weight distribution
The right pack disappears on your back when adjusted properly. For day hikes, 15–25 L is ideal; bigger invites clutter. When shoulders relax and the hip belt hums quietly against your jacket, you’ve dialed it in.
Fit and adjustment:
- Set torso length; the hip belt should sit on top of your hip bones.
- Tighten shoulder straps, then hip belt, then chest strap.
- Fine-tune so 60–70% of the weight sits on hips.
Packing order:
- Heaviest items close to your back and centered (water, food).
- Frequently used items high or in pockets (map, snacks, shell).
- Emergency items protected but reachable (first aid, headlamp).
Weight tips:
- Use small dry bags to organize and keep kit weatherproof.
- Share group gear to avoid duplicates.
- Weigh your pack at home; aim for under 20% of bodyweight on a day hike.
A tidy pack saves time, energy, and the comedy of unpacking everything for a lost lip balm.
Essentials list: water, first aid, and simple tools
Some items turn an inconvenience into a simple adjustment. They are small, light, and non-negotiable. The soft click of a headlamp switched on at dusk is the sound of good judgment.
Bring:
- Water: 1.5–3 L depending on heat and duration; consider a filter if reliable sources exist.
- First aid: blister kit, gauze, bandage, tape, antiseptic, pain relief, personal meds.
- Light: headlamp and spare batteries.
- Navigation: offline maps, paper map, baseplate compass.
- Emergency: whistle, space blanket, lighter/matches.
- Sun: SPF 30+, sunglasses, lip balm.
- Tools: small knife or multitool, 1–2 m of repair tape.
Bonus but useful:
- Trekking poles for knees and balance.
- Small sit pad for damp ground.
- Phone power bank and cable.
Check your kit each season; replace used or expired items and refresh your memory on where they live in your pack.
Safety and Navigation: Maps, Gps, Waymarks, and Weather Sense
Maps and compass: foundations beyond the phone
Paper maps don’t run out of battery, and a simple compass points the way when clouds wrap a ridge. Learn three basics and you’ll navigate confidently. The faint woody scent of a map freshly unfolded can calm the mind when the path blurs.
Core skills:
- Contours: tight lines mean steep; wide spacing means gentle slopes.
- Scale:
1:25,000shows detail for hiking; 4 cm on the map equals 1 km on the ground. - Orienting: use the compass to line up map north with real north.
Simple practice:
- In a park, identify three features (hill, stream, building) on the map and on the land.
- Walk a short bearing: pick a point, set the bearing, and follow it to a path junction.
- Trace your planned route with a finger, noting attack points (obvious features you will reach).
Reliable maps:
- Official national/topographic maps and park visitor maps.
- Local hiking club maps with current waymarks.
Build habit: check the map at every junction, not just when uncertain. Small confirmations prevent big errors.
Gps and apps: offline prep and battery management
Digital tools shine when set up well. They guide you, record your day, and help share plans. Without preparation, they drain fast or freeze at the worst moment. A soft vibration on your wrist at a turn—if you use a watch—can be a gentle nudge back on line.
App checklist:
- Download offline map layers for the entire route and surroundings.
- Load the GPX track and drop waypoints at junctions, water, and shelters.
- Test airplane mode and ensure the map still scrolls.
Battery smarts:
- Airplane mode on; location services only for map apps.
- Screen brightness moderate; lock when pocketed.
- Carry a 5,000–10,000 mAh power bank and short cable.
Combine methods:
- Follow waymarks with the map in your pocket; use the app as a confirm, not a crutch.
- If the GPX and waymarks disagree, read the terrain and check printed notes.
Tech multiplies skill; it rarely replaces it. The best navigation is layered.
Signs and waymarks: reading the mountain’s language
Waymarks translate trails for travelers: paint flashes, cairns, and posts tell a clear story if you listen. Learn the local code—Spain’s PR (yellow-white) and GR (red-white) markings are common. A dab of paint on rough bark can feel like a friendly wink when clouds settle.
Common markings:
- Painted blazes on trees/rocks: two horizontal bars or arrows.
- Posts at junctions with route names and distances.
- Cairns (stone piles) above treeline—use cautiously; they can be misleading if built by others.
Best practices:
- At each junction, stop, check map and signs, and confirm direction.
- If blazes vanish, backtrack to the last confirmed mark.
- Do not build new cairns; they confuse others and disturb habitat.
Ambiguity protocol:
- If in doubt for more than 100–200 m, stop and reassess.
- Compare compass bearing with the direction of the trail on the map.
- Look for subtle ground signs: compacted soil, cut roots, or consistent footprints.
Waymarks guide, but your decisions keep you safe.
Using forecasts to plan and decide on the day
Forecasts are decisions, not trivia. They shape start times, clothing, and even whether to go. A light northerly can feel refreshing in town but bites fiercely on a high pass. The crisp, metallic feel of wind against a jacket hood often tells you it’s time to layer up.
Before the day:
- Check two sources (e.g., AEMET, MeteoBlue) for your area and altitude.
- Note wind speed/direction, freezing level, precipitation windows, and thunder risk.
- Choose a route that fits the worst likely condition, not the best.
On the day:
- Start early to beat heat or storms; be moving at first light in summer.
- If the wind exceeds comfort on ridges, drop a contour or switch to a valley loop.
- Use “weather gates”: decision points where you stop and reassess (col, treeline, exposed traverse).
Postpone if:
- Thunderstorms are forecast along your route during your planned summit window.
- Freezing level is below the route with no winter equipment or skills.
- Winds are strong enough to affect balance on exposed ground.
Good days begin with smart calls and end with warm tea, not war stories.
Hydration, Food, and Pacing: Managing Your Energy the Whole Day
Think of your body as another piece of kit you prepare before, support during, and recover after the hike. Drink early, eat steadily, and move at a pace that feels conversational. The soft crunch of an oat bar shared at a shady bend often resets a group’s mood.
How much to drink:
- Cool to mild day: 0.4–0.6 L per hour.
- Warm to hot day: 0.6–1.0 L per hour.
- Add electrolytes in heat or for routes over 3 hours; they help prevent cramping and improve fluid retention.
What to eat:
- Aim for 200–300 kcal per hour.
- Combine slow-burn and quick energy:
- Slow: nuts, seeds, wholegrain wraps, cheese.
- Quick: bananas, dates, gels or chews for steeper pushes.
- Savory: mini sandwiches to balance sweet fatigue.
When to eat and drink:
- Drink small, frequent sips every 10–15 minutes.
- Snack every 45–60 minutes; a larger 10-minute break every 90 minutes.
- Front-load a little before long climbs.
Simple planning:
- Pre-hydrate at breakfast; top up a bottle with electrolytes for the second half.
- Keep snacks where you can reach them without removing your pack.
- Set a phone or watch reminder if you tend to forget.
Warning signs and fixes:
- Dehydration: dry mouth, dark urine, headache—sip steadily, add electrolytes, slow the pace.
- Bonk (energy crash): sudden fatigue, irritability—eat 200–300 kcal quick carbs and rest for 10 minutes.
- Heat stress: dizziness, chills, or confusion—seek shade, cool skin with water, consider ending the hike.
Post-hike recovery:
- Drink to thirst plus a little extra with electrolytes.
- Eat a balanced meal with carbs and protein within an hour.
Good fueling habits are insurance for joy on the trail.
Easy-route Highlights: How to Choose Outings That Delight
Your first hikes should feel rewarding even if you never touch a summit. Seek routes with viewpoints, water, and varied forest-and-meadow sections that keep interest high. A river’s cold hush beside the path or a hawk circling at a cliff edge can make a modest day feel magical.
What to look for:
- Viewpoints reachable in under 90 minutes.
- Water features: lakes, cascades, rivers with safe banks.
- Rich flora walks in spring and autumn color routes later in the year.
- Family-friendly loops near interpretive centers for simple learning stops.
Add light learning:
- Geology snippets: soft sandstone vs. harder granite explains footing.
- Flora/fauna notes: wild thyme’s scent on dry slopes; spotting vultures on thermals.
- Cultural touchpoints: shepherd paths, old terraces, or hermitages near villages.
Route ideas to prioritize:
- Valleys with
SLorPRloops from a village plaza. - Forest tracks to a balcony viewpoint with benches.
- Lakeside circuits with picnic spots and safe shoreline.
How to avoid frustration:
- Read recent trail reports for closures and muddy sections.
- Check whether viewpoints face into the sun at your arrival time; early or late light flatters photos.
- Choose routes with optional extensions; if you feel strong, add a spur.
Round off the day in town: a small café or bakery supports the community that maintains the trails. Good memories are easier to pack than bragging rights.
Frequently Asked Questions
How do I choose my first safe route?
Pick a route that fits three numbers: distance 6–12 km, ascent 200–600 m, and moving time under 4 hours with a buffer. Favor well-marked PR or family loops starting near a village or park center. Read two independent sources: official park pages and a recent local hiking club post. Use simple consejos senderismo—start early, set a turnaround time, and avoid exposed ridges on windy days. Scan the map for bail-out options and water. Finally, check the weather from AEMET or a comparable mountain service the night before and the morning of. Beginner hiking mistakes often begin with over-ambition; let your first hills teach gently, then build up over a few weekends.
What should I carry if the forecast changes and there’s no signal?
Pack a light waterproof with hood, a warm mid-layer, spare gloves or buff in cooler months, and an emergency blanket. Add a headlamp, whistle, baseplate compass, paper map, and a small power bank for your phone. If weather worsens and you lose coverage, descend to lower, sheltered terrain, avoid ridges, and consider stopping at a hut, farm track, or signed junction. Mark your position on the paper map, note nearby features, and backtrack to the last confirmed point if safe. If thunder approaches, leave high ground immediately and spread the group out. Prevention beats drama: download offline maps before you leave and tell a contact your plan and return time.
How much water do I need and how do I calculate it?
Use a simple rule: 0.4–0.6 L per hour in cool to mild weather, 0.6–1.0 L per hour in heat or on steep climbs. For a 4-hour easy hike on a mild day, carry at least 2 L; in summer heat, 2.5–3 L. If your route crosses reliable water sources, carry a small filter and top up. Add electrolytes during hot weather or anytime you’re sweating heavily to help fluid retention and reduce cramps. Signs of dehydration include headache, dry mouth, and darker urine. Plan sips every 10–15 minutes and keep a bottle easy to reach. Running out is preventable—carry a little extra if in doubt and drink early, not late.
How do I prepare physically for my first hike?
Give yourself 3–4 weeks of gentle build-up. Three times a week, walk 30–60 minutes with hills or stairs; add one longer weekend walk, increasing from 60 to 120 minutes. Include simple strength moves 2–3 times weekly: squats, lunges, calf raises, and planks, 2–3 sets each. Practice with your actual footwear and gradually load a backpack up to 10–15% of bodyweight. On the trail, keep a conversational pace and use micro-breaks on climbs. The last week, reduce volume slightly and focus on sleep and hydration. Preparation reduces injury risk and, more importantly, lets you enjoy the landscape at your own pace.
Book your experience — discover verified active nature experiences across Spain with trusted local providers on Picuco.
Conclusion: Prepare Wisely, Avoid Mistakes, and Enjoy Your First Mountain Day
Avoiding common hiking mistakes is less about memorizing rules and more about building a few steady habits. Plan the route with realistic distance and ascent, check the mountain weather from reliable sources, and carry a light, complete kit you’ve already tested. The single sensory promise for your first day is simple: the clean feel of wind and pine after an easy climb, not the grit of a rushed, risky decision.
Before your next free weekend, choose a short PR loop, pack from the essentials list, and set a turnaround time on your phone. Download offline maps, print the mini-checklists, and send your plan to a friend. If the forecast shifts, choose the lower option and return with a smile. Share what you learned with your group, and consider printing a one-page checklist to keep near your pack. Mountain confidence grows step by step, and each safe, satisfying day becomes the foundation for the next.